Humphrey de Bohun and Elizabeth Plantagenet had issue:
(Bo20-1) John de Bohun, b 23 Nov 1306, Pleshey Castle, Essex, England,
m. 1st Alice Fitzalan (Fi) of Arundel about 11325, 2nd Margaret Basset,
d 20 Jan 1335. (Bo20-1) John de Bohun, successor to his father, as Earl
of Hereford, Earl of Essex, and Lord High Constable. He was elected as
a Knight of the Bath in the 20th year of Edward II., having, by special
command of Price Edward, the robes for that solemnity out of the royal
wardrobe, as for an earl. He served in the Scottish wars, being in an infirm
state of health, was allowed in the 4th year of Edward III. to depute his
brother Edward to execute the duties of constable. He married (1) Alice
Fitz Alan, daughter of Edmund Fitz Alan, Earl of Arundel, and (2) Margaret
Basset, daughter of Ralph Basset, Lord Basset, of Drayton, but had no issue.
He died in 1335, when all his honors and estates devolved upon his next
brother, Humphrey de Bohun IX.
(Bo20-2) Humphrey de Bohun IX., successor to his brother as Earl of
Hereford, Earl of Essex, and Lord High Constable, and Knight of the Garter.
He was one of the great lords that assisted, in the 15th year of Edward
III., at the celebrated feast and justs which the king then held at London
in honor of the Countess of Salisbury, and, in the 20th year of the same
monarch, attended the king to the relief of Aguilon, then besieged by the
French. He was never married, and dying in 1361, his honors and estates
reverted to his nephew, Humphrey.
(Bo20-3) Edward de Bohun, successive primogeniturely to the honors.
(Bo20 = Bo20-4) William
de Bohun. See below. Earl of Northampton, was born about
1312. He was a personage of great eminence in the turbulent times in which
he lived, and one of the gallant heroes of Cressy. In the parliament held
at London, in the 11th year of Edward III., upon the advancement of the
Black Prince to the dukedom of Cornwall, he was elected Earl of Northampton,
on March 17, 1337, and from that period he appears the constant companion
in arms of the martial Edward, and his illustrious son. At Cressy he was
in the second battalia of the English army, and he was frequently engaged
in the subsequent wars of France and Scotland. He was entrusted at different
periods with the most important offices, such as ambassador to treat of
peace with hostile powers, commissioner to levy troops, etc., and he was
finally elected as a Knight of the Garter. He married Elizabeth
Badlesmere, daughter of Bartholomew
de Badlesmere and his wife Margaret Clare. Elizabeth was one of the co-heirs
of her brother Giles de Badlesmere, and widow of Edmund de Mortimer.
They had the following children:
(Bo20-6-1) Humphrey de Bohun X., succeeded his uncle, Humphrey
de Bohun IX, as 2nd Earl of Northampton, when only a minor, under the guardianship
of Richard, Earl of Arundel. He did not, however, long enjoy this great
accumulation of wealth and honor, for he died in 1372, in the thirty-second
year of his age, leaving by his wife Joane Fitz Alan, daughter of his late
guardian, the Earl of Arundel, two daughters, his co-heirs, as follows:
(Bo20-5) Edward de Bohun
(Bo20-6) Alianore Bohun, married
(1) James
Butler, Earl of Ormonde, and (2) Sir Thomas Dagworth, Lord Dagworth.
(Bo20) Margaret Bohun, married
Hugh de Courtenay (Co20), son of the Earl of Devon.
(Bo20-7) Agnes (Margaret) de Bohun, Baroness Ferrers of Chartley.
(Bo20-8) Edmund de Bohun
(Bo20-9) Hugh de Bohun
(Bo20-10) Mary de Bohun
(Bo20-11) Isabella de Bohun |

The de Bohun Coat of Arms: Azure, a bend argent
between two cotises and six lions rampant or. |
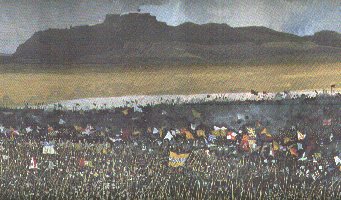
| Bannockburn Battle Sequence of Events
Siege of Stirling and the pact with Mowbray
In the year 1314, after 18 years of war, Scotland north of the Forth
was free. Stirling, one of the few castles still held by the English lay
under Scottish siege. Edward Bruce, the King's brother, lacking in siege
equipment, had remained there for many months in the hope of starving the
English out. Sometime in the spring though, Edward, in the chivalry of
the time, made a pact with the castle's governor, one Sir Philip Mowbray.
It was agreed that if an English relieving force had not arrived by midsummer's
eve, the castle would be surrendered to the Scots. Robert, on hearing of
this was furious with his brother. So far he had relied entirely on guerrilla
tactics to oust the English, and undoubtedly Edward II would send a force
north, which would mean a pitched battle if Stirling was to be saved.
Edward II, on hearing this news was only too happy to oblige, deciding
he could finish his father's work in one huge thrust. He amassed an army
of some 40,000 men with the intention of crushing the rebellious Scots
once and for all, so finally putting and end to the dispute.
His army was an enormous one, even by medieval standards. It included
some 2,500 heavy cavalry, 2000 Welsh bowmen and 500 light cavalry, with
the rest consisting of highly trained infantry. Edward felt openly confident
that the might of his powerful army would easily overwhelm the Scots, who
numbered only some 13,000. Following this army, Edward had a huge train
of equipment and supplies, which included weaponry, siege engines, foods,
wines, and the riches of the Knights and Barons. To watchers, the sight
of a column of such splendour marching past must have been magnificent.
Edward had his army muster at Berwick-upon-Tweed. From there, some two
weeks before the deadline, they crossed the border at Coldstream, and marched
north to Stirling.
Randolph's encounter with Beaumont and Clifford
On the 23rd of June, midsummer's eve 1314, the army of Edward II arrived
before the Bannockburn ford.
As Robert Bruce had anticipated, they had come by the old roman road,
so he had set his positions accordingly, his divisions lining the road
under the cover of the forest. For him to win he would need to fight the
battle on his terms, which meant confining the bulk of the English army
to a gap to small for them to fight at full force. He hoped then that his
schiltroms* could repel the thrust of the English cavalry, keeping his
lines
unbroken.
For the battle site, Robert had chosen the narrow gap between the woods
surrounding the Bannockburn village and those on Gillies Hill, near where
the road fords the Bannock Burn. Within the woods he blocked all paths
with branches and dug pits which he covered with sticks, anti-cavalry traps
intended to counter an outflanking movement. Then with his men in position,
he waited.
* A schiltrom was basically a large circle of men who carried huge 15
ft pikes. They were trained to march consistently in this formation with
pikes outwards, forming an impenetrable wall of spears.
On the arrival of the English, Stirling's governor, Sir Philip Mowbray
rode out to meet Edward. He pleaded that a force should be dispatched to
relieve the castles garrison, to which Edward agreed, giving him 500 cavalry.
Mowbray knew the Scots positions would make using the road impossible,
so he led the force, under Sir Clifford and Sir Beaumont along a narrow
bridle path leading from the village to the castle. Within the gorge, which
the path followed, the English Knights were well hidden from the Scottish
positions. Luckily, just before they had managed to pass, Robert spotted
them and immediately dispatched Randolph to intercept.
Randolph quickly gathered his men and charged down towards the English,
blocking their path. He knew that there would be no option but to fight,
as the English were 500 horse, and would be confident of breaking the Scots
lines. So, as the English cavalry gathered for the charge, within the Scots
schiltrom spears were grounded and muscles strained in preparation for
their impact.
The first wave of cavalry hit the Scots with tremendous force. Their
lines held sure though and many English Knights crashed to their deaths
on the wall of spikes. The cavalry retreated, gathered and charged again,
but still they could not break through. This continued for some time, each
charge weakening as more knights fell, their own dead blocking their path.
Meanwhile James Douglas, concerned for Randolph's men persuaded Robert
to let him take a small division of reinforcements down to the battle.
On arrival though he was greeted by a surprise; it was not the Scots who
were failing, but the English, who had given up charging and had now resorted
to throwing their hand weapons at the Scots, though to little effect. So
Douglas, seeing that it was Randolph's fight, and almost won, held his
men and watched as his friend finished the English himself.
The English cavalry began again to retreat, and gathered a small distance
from the Scots schiltrom. Suddenly the Scots, confident now of victory,
did something before unheard of in medieval warfare, they charged the cavalry.
For the English knights this was the last straw. Tired and disorientated,
they now found themselves swarmed by the Scottish infantry and in a blind
panic began to scatter. Of the 500 English Knights who set out to Stirling,
only around 400 struggled back to the camp. As for Scots loses, Randolph
reported only 6.
This victory, though small in the fact that they were still outnumbered
3 to 1, elated the Scots. Although they knew the worst maybe still to come,
their victory would not only demoralise the English, but prove undoubtedly
that a well disciplined schiltrom was capable of repelling heavy cavalry.
James and Randolph returned, taking up their positions again within
the Scots lines. On their arrival however, they were to be greeted with
the news that Randolph's men were not the only ones to have seen some action.
There had also been some skirmishing on the battle front, where The Bruce's
division were in position. These skirmishes had been sparked by an incident
which was undoubtedly the tensest moment of the entire campaign for The
Bruce's men, but with which any Scot with a knowledge of the King remembers
with pride.
Encounter of Bruce and De Bohun
The main bulk of the English van had crossed the Bannock Burn and taken
up position facing The Bruce's division. A young English Knight, one Humphry
De Bohun, spotted a lone figure riding back and forth along the Scots
lines. Moving closer, he noticed that the man carried no crest upon his
helmet, but a crown. Seeing that it was none other than King Robert himself,
Bohun realised in his quest for glory, that he could end the battle in
one go.
Moving from the English lines De Bohun, fully armoured and riding
a heavy cavalry horse urged his beast to a gallop, and lowering his lance
he aimed straight for the King. Robert, armed only with a battle axe and
on a smaller horse, held his ground, however, until the last second. Just
before De Bohun hit him, Robert quickly moved his horse aside and in one
blow split open both the young knight's with his battle axe.
The Scots gave a sigh of relief, many shouting about how senseless Robert
had been in endangering not only his own life but the future of their cause.
The King however replied only with a complaint to the fact that he had
broken the shaft of his favourite axe, which rather annoyed him.
This incident obviously could have had horrific consequences if The
Bruce had been killed. It would have left the Scots both leaderless and
Kingless on the eve of battle, probably putting to an end their long struggle.
Luckily Robert remained entirely unscathed to the great relief of his men.
That night, after further small skirmishes along the front line, the
English retired and made camp upon the carse, some distance from the Scots
lines. For Robert, it was a time to make some very important decisions.
From past experience, he knew that because of the small size of his army,
to beat the English he needed to fight them at his chosen location, preferably
a place where they were confined to a small front. Robert had originally
intended this to be between the forest of Gillies Hill and the Bannock
Burn gorge. Now that Edward's army had camped upon the carse, the battle
would inevitably have to take place on the flat field that stretched down
from the road towards it. This meant that the battle front was to be much
larger than Robert would have liked. The only benefit to this site was
the small gorge that lay between the carse and the field. Although it was
not particularly deep, it's sides were steep and it would be a slow process
for the large English army to cross safely. Robert knew that if he could
attack the English as they were still crossing, he might be able to drive
them back upon their own men still trying to cross the gorge. This would
cause confusion and disorganisation among them, exactly what he needed.
Later that evening a young Scottish Knight, deserting the English side,
rode into Robert's camp and asked to speak to the King, telling him he
wanted to change his allegiance. The King, always happy for new recruits,
especially from his enemy, accepted and let the man pay homage. With him
the knight also brought news, apparently the English had been very demoralised
by the events of the day and many were unhappy with young King Edward's
command. For Robert, this was the final factor in his decision. He spent
the evening discussing the matter with each division in turn, and asked
their opinions. For him, unlike many commanders of the time, the thoughts
of his men were as important as his own. And to the main question, would
they follow him and fight, he was given a resounding "yes".
Main Battle - 24th June 1314
At first light the Scots were already in position. Looking down towards
the carse they could see the English hurriedly preparing for battle, with
the first of their cavalry making it's way across the gorge. Robert the
Bruce gave one final address to his troops before they were given their
church blessing. Edward II, watching the Scots kneeling in prayer, laughed
aloud believing they begged for his mercy. A wiser man then told him; yes,
they did beg , but not to him.
Soon the main bulk of the English van had crossed the gorge and had
formed up in preparation for the charge. Robert then ordered his troops
to move out from the trees, and gathering into their schiltroms, they took
up position to face the onslaught. Within the English cavalry their was
confusion however, with two commanders arguing over who was to lead the
charge. One called for an advance and rode forward, but was only followed
by a few, the rest of the cavalry, momentarily confused struggled to follow.
The impact as the English horse hit the schiltroms was tremendous, but
the Scots held. Many of the English knights, charging unorganised, were
killed outright on the Scottish pikes, others fell or were dragged from
their horses to be crushed by their own men or killed by the Scots.
The lack of English organisation was now becoming horribly apparent
to them. Most of their archers were now across the gorge and in a panic
someone had given the order to fire. Unfortunately for them, not only were
they hitting the Scots but much of their own retreating cavalry. The archers
were bad news for the Scots, who no longer had the cover of the trees,
but Robert had planned for this. As soon as he gave the signal, Keith the
Marischal of Scotland, commanding some 500 mounted infantry charged out
of the woods and routed the archers from the field.
With the cavalry retreating, and the archers scattered, there was huge
confusion among the English ranks. The Scots, seeing this lifted their
pikes and slowly advanced, in perfect formation, driving their struggling
enemy back towards the gorge. What remained of the English cavalry continued
to retreat and charge, each time being beaten back by the wall of Scottish
spikes. With the Scots forcing those who had reached the field further
and further back towards the gorge, and at the same time the main bulk
of the English infantry still trying to cross, those who were retreating
were blocking those advancing. The English army's fate was sealed.
The schiltroms pressed on, pushing more and more men into the horrific
crush the gorge had become. Horses and men tumbled down the sides tripping
over each other until, as one witness described it: "bodies lay so thick
a man could cross the burn dry-shod".
Soon almost all of the English, most not even given a chance to fight,
were scattering. Many drowned as they tried to cross the Forth, others
were killed or crushed by their own companions in the mad race to escape.
Those still left fighting on the battlefield were few and Robert, seeing
the victory was theirs gave the order to break up and give chase.
Sir James Douglas, spotting the escape of Edward was given permission
by Robert to follow. The young King quickly reached the gates of Stirling
but no matter how much he pleaded, the governor Philip Mowbray refused
to let him in. Mowbray argued that he must hold his part of the pact as
the Scots had been true to theirs. With Douglas on his tail, Edward had
little time to argue so gave up and set off south. After many days of hard
riding, made worse by Douglas happily picking off any stragglers of the
Kings party, he eventually made it to Dunbar Castle. From there a ship
took the English king, thoroughly beaten and humiliated, back south to
England.
For the Scots, the battle was undeniably one of the greatest in history.
Their King, who for 18 years had fought for a cause once thought impossible,
had led them to victory. Edward may have had the military might of all
England behind him, but in the end it was no match for an army of freedom
fighters distinctly lacking in blue blood.
|
Battle Location
There has long been confusion as to the exact location of the battle
(see battle map above). This is probably due to the fact that much of the
site is now covered with the present village of Bannockburn, where one
would find it harder to envisage a medieval battle. For this reason historians
have preferred to put the site on the flat land to the north, bordering
the river Forth. In the present day this idea would seem acceptable as
the site is well drained agricultural land, perfect conditions for battle.
One must remember though, that in the 14th Century it would have been the
marshy wetland of the river Forth flood plain, across which not even an
incompetent fool like Edward II would choose to do battle. For this reason,
and through the interpretation of records it is generally agreed that the
battle site lay to the north of the Bannockburn gorge on relatively flat
land between the carse (marshland) and Gillies hill.
Battle of Boroughbridge
16th March 1322
The battle of Boroughbridge saw the total defeat of rebel forces under
the Earl of Lancaster. Thomas felt he had been snubbed by Edward, and denied
his true place as the king's main advisor, due to him as the king's cousin,
and had found allies in the welsh marches, alienated by the actions of
the king's favourites. By the time of Boroughbridge, Edward had defeated
the marchers, leaving the northern rebels isolated. In the period before
Boroughbridge, they had been moving north, away from the king. Thomas of
Lancaster was executed after the battle, and a popular cult soon grew around
him. It was a small but dramatic battle, or at least appears so thanks
to the graphic detail provided in the contemporary accounts. It was achieved
by a royal commander who took a strong position, holding a major river
crossing, giving the rebels no alternative but to fight for control. He
also used a very effective combination of tactics against the heavily armoured
rebel force: a defensive wall of spears copied from the Scots and an offensive
arrowstorm provided by his archers. In this, Harcla's victory foreshadowed
the devastating success achieved some years later against the French at
Crecy.
Battle of Boroughbridge
The Battle of Boroughbridge was a small but important battle in the
conflicts between Edward II of England and his rebellious barons. The battle
took place near at important bridge across the River Ure called Boroughbridge,
northwest of York.
Early in 1322, King Edward took forces north in England to subdue his
cousin Thomas, Earl of Lancaster. Thomas was pushed further north, where
he may have been hoping to join up with forces from Scotland. However on
March 16, he found his way across the river Ure barred by forces of Sir
Andrew Harclay. Sir Andrew used the infantry tactics which were later to
prove so effective against the French at Crecy, and the rebels were defeated.
Of the rebel leaders, Humphrey de Bohun, 4th Earl of Hereford,
was killed, and the rest captured. The prisoners were later convicted of
treason and executed.
The action was fought for control of a narrow bridge and a nearby ford
by which the Great North Road crossed the River Ure. Today the battlefield
has been largely engulfed by the town, but in 1322 Boroughbridge had probably
not yet extended as far north as the bridge. The land on either side of
the river will have been floodplain meadow. But, while the bridge was probably
very close to its present site, it is uncertain exactly where the ford
lay, making it difficult to appreciate exactly how all the forces were
deployed and where they fought.
The site is easily explored on foot from a car park within the town.
Despite urban expansion, the battlefield can still be easily appreciated
on the ground, because it was a fight across the river and there is still
today considerably more open ground than might at first appear.
|
Timeline 1300 to 1323
1300 May - Edward starts another Scottish campaign
After staying briefly at the Abbey of Bury St.
Edmunds, Edward I travelled north to Carlisle. His son, Edward (II) of
Caernarvon remained at the Abbey for a week longer, living as a monk, before
following his father. The king ensured his standard had been blessed by
every holy relic that the Abbey possessed.
July - Caerlaverock Castle siege
The castle fell within 5 days and the Scots gave
Edward I little resistance. Edward (II) of Caernarvon took control of the
rearguard of the English army and apart from a small skirmish, saw no action.
Aug - The Pope Intervenes
The Pope sent a letter to Edward demanding that
he should withdraw from Scotland. Edward ignored the letter, but because
the campaign was not a success, the English soon left for England anyway.
Oct 30 - Truce with the Scots
Edward arranged a truce and returned to England.
1301 Feb - Edward (II) invested as Prince of Wales
Edward (II) was invested by his father king Edward
I as 'Prince of Wales' and was granted royal lands in Wales.
May 20 - Treaty finally signed
The peace treaty between England and France was
finally signed.
Summer - Edward advances into Scotland
Edward I finds the land laid waste as he advanced
into Scotland. At Linlithgow he halted, built a castle where he spent Christmas.
1302 Spring - Treaty is signed
Edward and the Scots signed a peace treaty and
John Segrave was left in charge in Scotland with a force of 20,000 men.
1303 Edward takes Urquhart Castle
As part of Edward's campaign in Scotland he attacked
and took control of Urquhart Castle on Loch Ness. Sir Alexander Comyn was
left in change.
Treaty of Paris
After Philippe IV's defeat at Courtrai, he called
on Edward I for a peace treaty. Part to this involved Edward regined some
French land and Philippe's daughter marrying Edward's son, the future Edward
II, king of England.
Spring - John Comyn is appointed regent
The Scots appointed John Comyn as regent and with
Sir Simon Frazer he marched south from northern Scotland to repel the English.
Segrave was captured by the Scottish forces.
May - Edward's last campaign in Scotland
William Wallace had returned to Scotland from France
where he had been in exile and so Edward took an army into Scotland.
Dec - Edward stays at Dunfermline Abbey
Edward spent the winter months at Dunfermline Abbey
where he planned the attack on Stirling Castle.
1304 Canterbury Screen of choir and chapter house building
work
Canterbury Screen of choir and chapter house building
work.
See Also
Canterbury Cathedral
Spring - Edward besieges Stirling Castle
Edward lays siege to Stirling Castle.
Jul - Stirling Castle surrenders
The Scots surrendered Stirling Castle to Edward.
1305 William Wallace captured
William Wallace was betrayed and captured by the
English.
Aug - Wallace executed
William Wallace was tried and executed.
1306 Philippe confiscates Italian bankers' goods
To regain money spent on expanding his domains,
Philippe turns his attentions to Italian bankers and Jews within the country
from whome he can confiscate goods.
Feb 10 - John Comyn murdered by Robert Bruce
Robert Bruce murdered John Comyn.
Mar 25 - Robert Bruce is crowned Robert I of Scotland
At Scone, Robert Bruce was crowned King of Scotland.
1307 Philippe adds Bigorre to his territories
By paying rent to the Bishop of Puy, Philippe added
the county of Bigorre to his lands.
May 10 - Battle of Loudoun Hill
The English are defeated by the Scots at the battle
of Loundoun Hill lead by Robert I of Scotland.
Jul 8 - Edward II becomes king
Edward the eldest son of Edward I became King of
England.
Oct 13 - Knights Templar are arrested
King Philippe of France ordered the arrest of all
Knight Templars in France. The order to arrest the Templars was sent out
several weeks before the date possibly giving the Templars time to hide
their wealth.
1308 Rebuilding work at Exeter Cathedral
The smaller choir transepts, rood screen and sedilia
were all constructed between 1308 and 1326 under Bishop Stapledon.
Bruce takes Urquhart Castle
Robert Bruce captured Urquhart Castle and placed
it in the care of Sir Thomas Ranpolph, the Earl of Moray.
Jan 25 - Edward marries
Edward II married Isabella of France, the daughter
of King Philippe IV of France. The marriage took place at Boulogne and
Edward left Gaveston as Regent in his absence. Edward alienated the Lords
by placing Gaveston in such a powerful position.
Feb 25 - Edward's Coronation
Edward II was crowned at Westminster Abbey. During
the ceremony Gaveston was given the honour of carrying the crown. During
the banquet that followed the King spent much more time with Gaveston than
his wife. The Queen's uncles, who had travelled with her from France, left
to report back to the King of France of the King's favouritism for Gaveston
over Isabella. As part of the coronation ceremony Edward swore an oath
that he should abide by the laws and customs that the community and realm
determined.
Jun - Gaveston banished
Parliament was unhappy with Gaveston's actions
as Regent while Edward was away. Gaveston's closeness to Edward was also
distressing for Edward's new wife as well. Parliament concluded that Edward
should remove Gaveston and the knight was given the role of Lieutenant
of Ireland.
1309 Bruce recognised as King
Robert Bruce was formally recognised as King of
Scotland by the Scottish parliament at St. Andrews.
1310 Wells Cathedral Lady Chapel
Work commenced on the Lady Chapel of Wells Cathedral.
Sep - Edward campaigns in Scotland
Supported by Earls of Gloucester, Warwick and Cornwall,
Edward took an army into Scotland. Edward directed the assaults from Berwick.
The campaign was fruitless eventhough Gaveston managed to reach as far
north as Perth.
1311 Bruce attacks the north
The conflict within England gave Robert Bruce the
opportunity to attack towns and forts in the north of England. He was commonly
paid large sums of money by the towns' people to leave them alone. In this
way he was able to raise enough money to buy better weapons for his army.
Qtr 1 - Lancaster pays homage
Lancaster had to pay homage to the king for the
new lands he had received with his new earldoms. Edward was in Scotland
but Lancaster refused to leave England and Edward met Lancaster at Haggerston
Castle on the border. Gaveston was with the king but Lancaster refused
to meet him.
Qtr 1 - The rise of Thomas Earl of Lancaster
While Edward II was in Scotland, his Regent, the
Earl of Lincoln died. and was replaced by his son-in-law Thomas, Earl of
Lancaster. Lancaster became the Earl of Lincoln and Salisbury, but already
held the titles of Earl of Leicester and Derby. Holding so many titles,
made Lancaster the most powerful Baron of the time. His hatred of Gaveston
was to become a major problem for the king.
Jul - Edward returns to England
Edward II left Scotland and returned to England
to attend a session of Parliament. Gaveston was left behind at Bamburgh
Castle where he was relatively safe from the Lords Ordainers.
Aug - Ordinances
A series of government acts made by the lords Ordinaners
to access control over Edward II. This involved increasing their control
over Edward's finances, renewing Piers Gaveston's banishment, etc.
Sep 27 - Ordinances Proclaimed
The Ordinances were publicly proclaimed at Paul's
Cross. In addition, Gaveston was ordered to leave the country by the 1st
of November and to be stripped of his titles. Nov 3 - Gaveston leaves
Gaveston left the country a few days later than
he should have done, but even then he didn't go far. By Christmas he had
returned to Edward's side and made public appearances with the King. Edward
also gave Gaveston his title of Earl of Cornwall back to him.
1312 Qtr 1 - Edward looks to Scotland for help
Gaveston's return to England forced the Archbishop
of Canterbury to honour his threat of excommunication and the Earls to
prepare for civil war against the king. Edward and Gaveston travelled to
Scotland to seek help from Robert the Bruce but were not welcome. At Tynemouth
the King and Gaveston took a boat to Scarborough leaving behind them everything
including Isabella, Edward's wife. Gaveston took refuge at Scarborough
Castle and Edward went to York.
May - Gaveston surrenders
While the Earl of Lancaster set up camp midway
between York and Scarborough to prevent Gaveston and the King rejoining,
the Earls of Pembroke and Surrey besieged Scarborough castle. The castle
was not prepared to withstand the stand-off and Gaveston surrendered after
a couple of weeks. The terms of his surrender were generous and Pembroke
gave his word that Gaveston would not be harmed until he was presented
to Parliament.
Jun 19 - Gaveston executed
The Earl of Pembroke with his captive Gaveston,
stopped at Deddington for the night. Pembroke left Gaveston to attend to
other matters. The Earl of Warwick took advantage of Pembroke's absence
and took Gaveston from his bed. They went to Warwick castle and Gaveston
was thrown in the dungeon. The four Earls, Lancaster, Warwick, Arundel
and Hereford took the decision that Gaveston should be punished and took
him to Blacklow Hill where he was executed. As Gaveston was under excommunication,
the body was not buried straight away.
Nov - Future Edward III is born
Edward the future king of England was born at Windsor
Castle and was known as Edward Windsor.
1313 The Scots regain ground
Using stealth and surprise tactics Robert Bruce's
army recaptured Perth, Dundee, Edingburgh and Roxburgh from English occupation.
Montagne and Tournai fall to Philippe
More lands were added to Philippe's domain.
Jun - Stirling Castle Siege
Stirling castle was still under the control of
English forces but was under siege from the Scots lead by Edward Bruce.
Bruce and the English commander, Sir Philippe de Mowbray, came to an agreement
that if English forces had not reached the castle by midsummer 1314, Mowbray
would surrender the castle to the Scots. Bruce even let Mowbray leave the
castle to inform the English king of the agreement.
Dec 23 - Edward prepares for invasion
The king call upon the earls to provide men and
arms and to meet at Berwick on the 10th of June 1314 to attack the Scots.
1314 Bruce orders destruction of castles
To prevent Scottish castles falling into English
hands, Robert Bruce ordered that the castles at Roxburgh, Linlithgow and
Edinburgh should be destroyed.
Mar 18 - Jacques de Molay and Geoffroi de Charney
burnt at the stake.
Jacques de Molay and Geoffroi de Charney were burnt
at the stake declaring their orthodoxy on an island on the River Seine.
Apr 20 - Pope Clement V dies
When the Knight Templar leader Jaques de Molay
was burnt at the stake on 12 March 1314 he vowed that the Pope would soon
die. Pope Clement V was dead within 40 days.
Jun 17 - Edward leaves Berwick
Edward II and his army left Berwick to march to
Stirling Castle which they had to reach before midsummer's day if the castle
were to be saved from falling back into the hands of the Scots.
Jun 24 - Battle of Bannockburn
Forces lead by Edward II are defeated by Robert
I at Bannockburn. Edward was trying to reach Stirling Castle to relieve
the forces there. This was an important battle for the Scots to win and
helped them to make some gains of land in northern England, even if it
was short-lived.
Sep - Edward loses power to Lancaster
After the defeat at Bannockburn, the death of Gloucester
and his army scattered, Edward had to hand power over to the Earl of Lancaster
and the Lords Ordainers. Lancaster had kept back his own personal army
in readiness for Edward's return and Edward had no option. Lancaster then
replaced the Edward's supporters in key seats of power with his own Lancastrian
supporters.
Nov 29 - Philippe IV, the Fair dies, and is succeeded
by Louis X
Philippe, King of France, died of a hunting accident
within the same year as the deaths of the Knight Templar leaders at the
stake. His was succeeded by his eldest son Louis X.
Dec - Gaveston buried
Edward had delayed having the body of Gaveston
buried until he had taken revenge for the murder, but because the King
was powerless to act against the Ordainers, he decided to hold a lavish
ceremony to bury his dead friend.
1315 Lancaster in power
For the whole of 1315 Thomas, the Earl of Lancaster
was in control of England and he embarked on a campaign to create a network
of supporters in all positions of power. It seems that every section of
society had Lancastrians that he could depend on.
See Also
Thomas (Earl of Lancaster)
A year of flood, famine and disease
Natural disasters this year across Europe leading
to economic problems.
Wells Cathedral Central Tower
Work commenced on the central tower of Wells Cathedral.
This needed strengthening and in 1338, new internal arches were added to
support the weight.
1316 More famines and floods.
Natural disasters this year across Europe lead
to economic problems.
Philippe V becomes King of France
Philippe, the brother of the previous King of France,
became regent and then King of France.
See Also
Philippe (V, the Tall, King of France 1316-1322)
John (I, King of France 1316)
1318 Aug - Hugh Despenser is made Chamberlain
Edward II made Hugh Despenser his new Chamberlain.
See Also
EDWARD (II, King of England 1307-1327)
Despenser, Hugh (the younger)
Aug 9 - Treaty of Leake
The Earl of Pembroke and his 'Middle Party' held
discussions with the Earl of Lancaster during which it was agreed that
a council should be formed that would advise the King, and that the King
should not be able to act without the council's advice. Lancaster was also
assured that he and his followers would be pardoned for any illegal acts
that they may have performed during the time of their power. Lancaster
agreed to the Treaty and met Edward to reconcile their differences.
S1319 Jun - Edward marches to free Berwick
The last Scottish town to be held in English hands
had been captured by Robert the Bruce. The loss of Berwick brought Edward
and Lancaster together. Their common goal was to recapture the town and
together with the Earl of Pembroke and Surrey they marched north.
Sep 20 - Battle of Myton
While the best of the English army were at Berwick,
a Scottish army lead by Sir James Douglas invaded Yorkshire. With an untrained
army, the Archbishop of York William Melton tried to fight off the Scots
but was defeated at Myton-in-Swalesdale. With the Scots threatening their
lands in the north, the earls with Edward at Berwick abandoned the siege
and returned to home. Queen Isabella who was in York at the time managed
to escape to safety at Nottingham.
1320 Apr - Declaration of Arbroath
Robert the Bruce drew up the Declaration of Arbroath
which defined Scotland's sovereignty and Robert's right to be King. This
was sent to the Pope in the hope that he would lift the excommunication
order under which Robert was still held for the death of John Comyn in
1306.
1321 Qtr 1 - Despenser and the Marcher Lords
Hugh Despenser began obtaining lands in South Wales.
He did this by exchanging estates he held in England and by obtaining grants
from the king. He even obtained the Isle of Lundy. When the last male heir
of the Marcher Lord Braose family died, Despenser was able to obtain the
land that the family owned in and around Swansea. This angered the other
Marcher Lords as they had customs that allowed land to pass into the hands
of one another. The Marcher Lords threatened to start a civil war and it
was agreed that a Parliament should be called to settle the matter. It
was also agreed that Despenser was to be held in custody by Lancaster until
the meeting but Despenser refused.
May 24 - Meeting at Pontefract
Lancester held the first of two meetings to gather
support of Barons and the clergy to remove the Despensers from power. The
second meeting at Sherborn-in-Elmet near York was held on June 28th.
Jul - Parliament at Westminster
Lancaster put a large amount of pressure on Edward
to remove the Despensers from power. The Marcher Lords brought a force
to London and threats were made that Edward would be removed from the throne
if he did not comply.
Aug - The Despensers are banished
Both Despensers were banished from England. Hugh,
the elder left without any fuss, but his son, Hugh the younger had different
ideas and at first was given refuge by sailors of a Cinque Port and then
started a spell of piracy.
Oct - Siege of Leeds Castle
Edward was forced to lay siege to Leeds Castle
after an incident involving his wife Queen Isabella. The Queen had wanted
to stay at the castle while travelling to Canterbury but was refused entry
by the owners wife. The owner of the castle, who was not there at the time,
was Lord Badlesmere, a supporter of Lancaster. When Isabella's men tried
to gain access to the castle, some of them were killed. On hearing of the
problem, Edward took an army to the castle and after a week broke the siege.
Several of the Marcher Lords began to march into England in support of
Lord Badlesmere. They only got as far as Kingston-upon-Thames when the
siege ended. Edward then had every excuse to engage the Marcher Lords in
their act of rebellion.
1322 Charles IV becomes King of France . Charles
succeeds his brother Philippe as King of France.
Qtr 1 - Edward attacks the Marcher Lords
Edward advanced up the Severn Valley and crossed
the river at Shrewsbury. Several of the Marcher Lords surrendered to the
King without a fight. Lancaster had moved to his base at Pontefract. The
King took time to take control the castles belonging to the Marcher Lords.
Jan - The Despensers return
The Archbishop of Canterbury had ruled that the
banishment of the Despensers was illegal at the end of 1321 and as soon
as they heard the news, the Despensers returned to England.
Mar 16 - Battle of Boroughbridge
Lancaster left his base at Pontract and headed
north. At the bridge crossing the river Ure at Boroughbridge he was halted
by an army lead by Andrew Harcley, the Earl of Carlisle. Harcley held the
bridge against Lancaster's attacks and Lancaster was forced to surrender.
Lancaster was taken back to Pontefract where Edward had taken control.
Mar 22 - Lancaster Executed
Edward finally had his revenge for the death of
Gaveston when Thomas, the Earl of Lancaster was executed outside the walls
of Pontefract castle.
May - Parliament at York
Edward was now back in control of the country and
at the Parliament held at York the rebels who had fought against him were
punished, many being executed for treason. The Ordinances against Edward
were repealed and those who had supported Edward through the bad times
were rewarded. The elder Hugh Despenser was made Earl of Winchester. The
younger Despenser was given large amounts of land forfeited by the rebels.
S Jul - The Scots invade
The two year truce that had been agreed after the
failed siege by the English at Berwick expired and Robert the Bruce invaded
the north of England. Aug - Edward advances into Scotland
In response to Robert the Bruce's attacks in the
north of England, Edward called for an army and took them into Scotland.
The Scots were prepared for the English and had burnt land and supplies
in front of Edward's army making it difficult for the English to survive.
Oct - Edward almost captured
After returning from Scotland, Edward and Queen
Isabella rested at Rievaulx Abbey in Yorkshire. The Scots were still nearby
and met the English army lead by the Earl of Richmond near Old Byland.
The Scots defeated the English army and Edward had to flee to escape capture.
Isabella too escaped.
1323 Mar - Peace negotiations
Edward and Robert the Bruce began negotiations
for a peaceful settlement of their differences. There were difficulties
because Robert claimed the title of King of Scotland but Edward initially
refused this because he had inherited the title from his father Edward
I. The execution of the Earl of Carlisle had lead to the start of negotiations.
Carlisle had approached Robert with the intention of preparing the ground
for peace talks but had not informed the king of his intentions. His actions
were discovered and the king assumed his actions were treasonable. Carlisle
was executed as a traitor.
May - Treaty signed
A thirteen year peace was signed at York between
Scotland and England.
Autumn - Mortimer escapes from the Tower
Mortomer of Wigmore escaped from the Tower of London.
|

